Very nice work, Jan! This must have taken you quite awhile to do!


Very nice work, Jan! This must have taken you quite awhile to do!
Thanks! I added a little explanation on how to do this. I told my brother about this last thursday night and he offered to help me. We started friday night and we finished saterday afternoon. I estimate about 10 hours of work. There are still a few things that I want to change, but I like the result so far already.
It is very very hard to get the right colors. Also all the details take lots of time to paint and paint around. I guess you can all see the 100% file on Flickr? You will also notice a specific grain, that is because it is a scan of a photo and the grain is the structure of the paper.
The grain and also the softness of the original make it look even more like a painting.
Anyway I enjoyed it a lot and if I see more opportunities that are worth it I will definitely try again. Thanks!
Practicing a few more photo manipulations in photoshop this morning. I think this is the best thread going for me to put my crazy over the top concoctions in ...LOL!

Wow! Very cool work Denise! I really like it and would say it looks very real to me. The only thing that bothers me is the thickness and headangles of the canvas. The size and angled lines just don't look right.
Edit: it's mainly the bottom thickness(not so much the sides). Too much of the bottom is visible for this angle to look truly.
Still I would applaude you for the processing in these shots. Nice!
Keep the crazy coming
Last edited by Sheiky; 11-04-2012 at 07:33 PM.
I completely agree with you, Jan! I knew something just wasn't right but couldn't place exactly where I went wrong. These were the first two I did using the easel and it is quite the photoshop learning curve. If I try it again, at least now I know where to fix it. Thanks!Originally Posted by Sheiky

I bet it was quite a learning curve! I wouldn't know how to replicate your work that's for sure.
If you still have the psd files with layers it's quite an easy fix. Just mask half(for example) of the bottom part and add a few new lines, one on the left, one on the bottom and one on the right side.
How exactly did you process the photos by the way?
I already closed up the file and only saved the jpeg of the manipulated photo
I came across the "how-to" on this website ....
http://www.photoshopstar.com/photo-e...oil-paintings/
Lots of cool tutorials here and I hope to try a number of them!

Nice one Denise - I agree with Jan, the bottom edge is a bit wide but otherwise they're great.
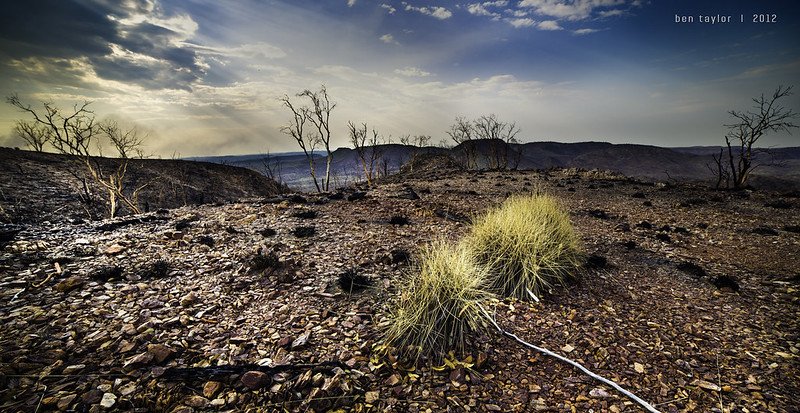
Thought I'd post a couple of before and afters to show the power of RAW files and the hidden details you can drag out of them. There are no colours etc masked on top of these images (i.e. to make the sky blue etc) but I have applied a couple of graduated filters, contrast, clarity and highlights/shadows adjustments. I don't normally have any sort of standard workflow, mostly trial and error. All done in Adobe Lightroom 4.2 and just the text added in Adobe Photoshop CS6
Before:
The other side unprocessed-6684 by Ben__Taylor, on Flickr
After:
The Other Side by Ben__Taylor, on Flickr
Before:
Sole Survivor Unprocessed-6673 by Ben__Taylor, on Flickr
After:
Sole Survivor by Ben__Taylor, on Flickr
http://www.flickr.com/photos/ben_taylor_au/ www.methodicallymuddled.wordpress.com
Canon 5D Mark III | Canon 5D Mark II | Samyang 14mm f/2.8 | Canon 35mm f/1.4L USM | Sigma 85mm f/1.4 EX DG HSM |Canon 70-200mm f/2.8L IS II |Canon 2 x Teleconverter III | Canon 580 EX II Speedlite | Really Right Stuff TVC 34L | Really Right Stuff BH55 LR | Gorillapod Focus | Really Right Stuff BH 30
That's too bad Denise. The tutorial is really nice, thanks for sharing!
@Ben, WHAT!!!!??? Lol I always knew you were good with photoshop, but I also imagined the Aussie landscape to be much more interesting than my place. Your photoshop work looks amazing. You really should teach us(or only me) some of your moves, this is really good. By the way, big thumbs up for the compositions, they are very well done.
Ah thanks a lot Jan. If I get a chance I'll put together a bit of a workflow on one of these to show what I've done. Pretty sure the editing history will still be in lightroom.
The landscape out here is highly variable, probably because it's such a big expanse of land. There's some really incredible spots but plenty of flat areas with very little vegetation, particularly where we live.
Last edited by btaylor; 11-06-2012 at 11:44 PM.
http://www.flickr.com/photos/ben_taylor_au/ www.methodicallymuddled.wordpress.com
Canon 5D Mark III | Canon 5D Mark II | Samyang 14mm f/2.8 | Canon 35mm f/1.4L USM | Sigma 85mm f/1.4 EX DG HSM |Canon 70-200mm f/2.8L IS II |Canon 2 x Teleconverter III | Canon 580 EX II Speedlite | Really Right Stuff TVC 34L | Really Right Stuff BH55 LR | Gorillapod Focus | Really Right Stuff BH 30
 Posting Permissions

 Reply With Quote